Either way though, I'll be making these pillow cookies I saw over on the Bakerella website as soon as the house is cool enough to bake again.
They look delish and right up my alley! (Well, once the wedding festivities are over...I have to make sure that I fit in my bridesmaid dress and that Dave fits into his tux!)
Pillow Cookies
Have you ever had any pillow cookies? I’ve only had them once, but I was immediately smitten. I found them in the bakery section of the Fresh Market sometime last year. They were some sort of sugar cookie wrapped around a brownie center. I immediately went on the hunt for a similar recipe but didn’t have much luck until just a few weeks ago when I was rummaging through some of my aunt’s recipes.
And there it was. A torn out recipe for Chocolate Chip Brownie Pillows.
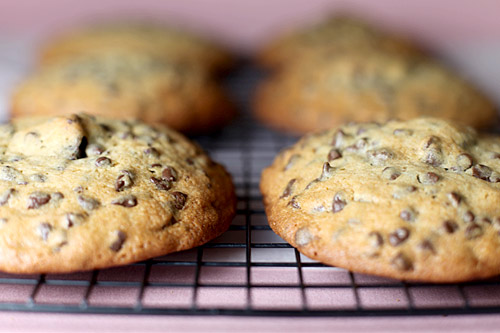
Not sugar cookies, but good enough. Better even. And when I read the how-to, it all made sense. I had been throwing around scenarios in my head trying to figure out how the brownie batter and cookie batter all came together to form such soft sugary cookies.
And… It’s easier than you think.
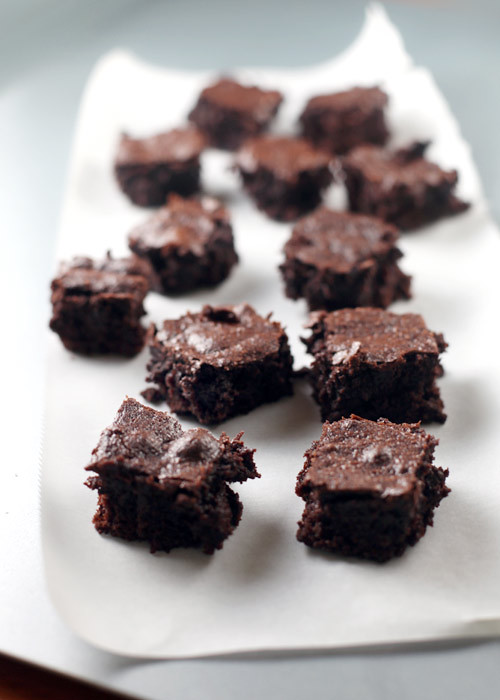
First… bake up some brownies. You can just use your favorite box mix if you like. Let them cool and cut about ten 1 inch squares. You won’t need the rest for the cookies. I’m sure you can find something to do with the leftovers.
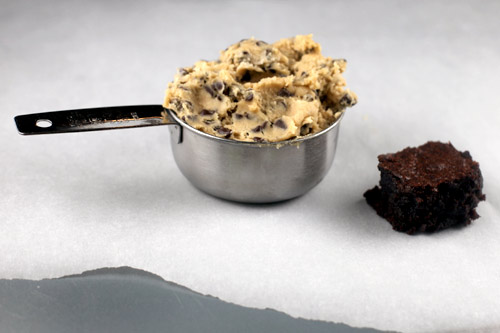
Then you need some chocolate chip cookie dough (recipe below). The dough should be chilled for at least an hour before using.
Each cookie uses about 1/2 cup of dough. Yes, you read that right. One half cup. For each.
And yes, they are ginourmous!
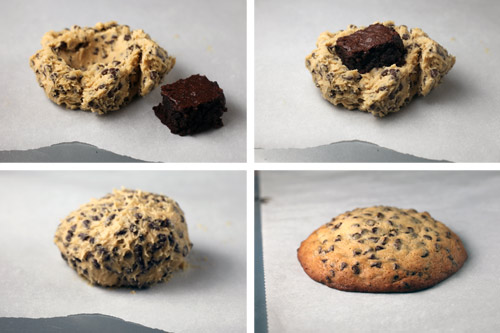
All you do is place the dough on parchment paper and make a pretty big indention in the center. Place the small brownie in the middle and fold the dough around it to form a ball. Then bake. I know, I was a bit skeptical at first, too. But it worked perfectly.
Not convinced? Want to see it again.
Okay. here goes.

Place 1/2 cup of cookie dough batter on a parchment lined baking sheet.
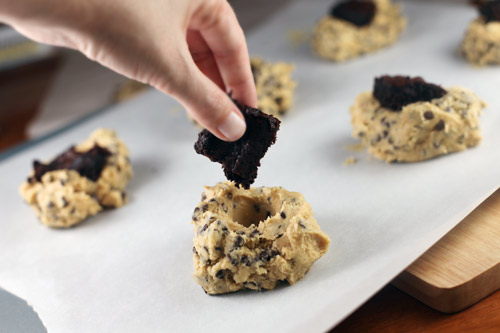
Make indentions in the dough and place a 1 inch square brownie in the center of each.
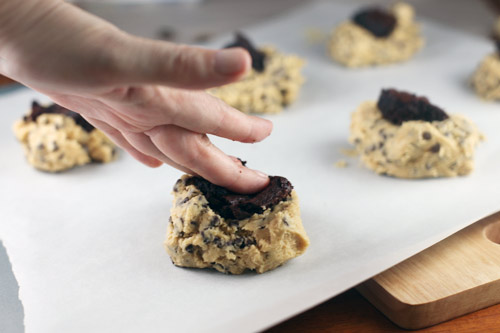
Smoosh it a little, so the cookie dough surrounds the edges of the brownie.
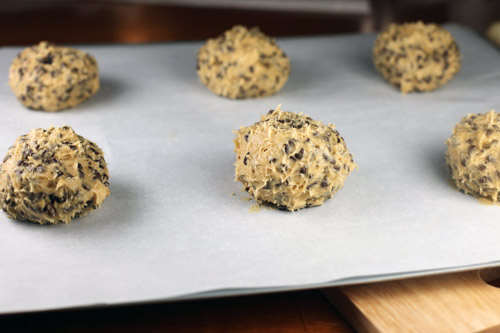
Then work the dough around the top to cover the entire brownie and shape them into balls.
Place no more than 6 on a 15 x 20 inch baking sheet at a time because these guys are HUGE!
Bake and voila………

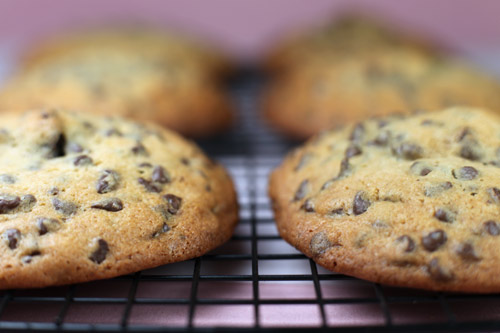
Giant pillow cookies. Now these are much, much, much larger than the ones I had from the Fresh Market. And actually, the process may not even be similar, but the result reminds me of them. I’m guessing these could go smaller if you like, just use a smaller brownie to start.
But I love how big the are.

Gigantic.
I guess you want to see the inside.
The magic.
The pillowy goodness.
Let’s face it – you just want to see the brownie.
I know. I know.
Okay, here ya go…

Oh my.
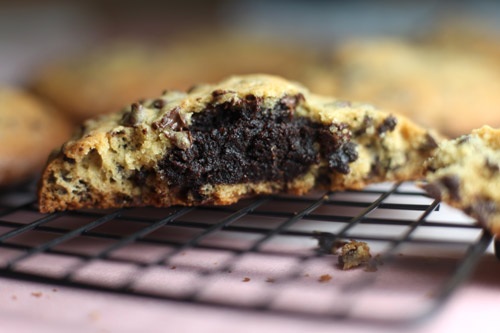
I’m in love.
Brownie Pillow Cookies
1 package brownie mix
1 cup butter, room temperature
1 1/2 cups packed light brown sugar
2 large eggs, plus 1 egg yolk
1 tablespoon vanilla
2 1/2 cups all purpose flour
2 teaspoons baking powder
1/2 teaspoon salt
1/2 teaspoon baking soda
12 oz. bag miniature semi-sweet chocolate chips
Make brownies according to package and let cool. Cut about ten 1 inch squares. Enjoy the remaining brownies. (I used a pan about 8 X 8)
For the chocolate chip cookie dough, beat butter with a mixer until creamy.
Add brown sugar and beat until smooth.
Add eggs, yolk and vanilla. Beat until smooth.
Combine flour, baking powder, soda and salt in a medium bowl and stir together with a wire whisk.
Add flour to butter mixture and beat until combined. Stir in mini chips.
Let dough chill covered in the refrigerator for at least an hour.
Preheat oven to 350 degrees.
Use a measuring cup to scoop batter by the 1/2 cup. Since it’s chilled, you may need to pack it with a spoon. Then use the spoon to remove the dough from the cup and place it on parchment paper. Work quickly so the dough remains chilled or either prepare one cookie at a time so the rest of the dough remains cold.
After the dough is on the parchment paper, make an indention and place a 1 inch square brownie in the center. Press the brownie down gently and work the remaining dough around the brownie. You can use your hands to shape the dough into a ball.
During this step, I found it easier to use a piece of parchment paper as a work surface since the dough can get sticky and then I used another piece of parchment paper for the baking sheet. If your dough gets too soft, you can chill the rolled dough balls for a few minutes right before baking.
Prepare six cookies at a time using a large baking sheet (15 X 20) and bake at 350 degrees for about 18 minutes. Return the remaining dough to the refrigerator until time to bake the second batch.
Cool on the baking sheet for a few minutes and then cool completely on a wire rack.
Makes about ten cookies using a little less than a 1/2 cup of dough for each cookie.
If your cookies start to get too brown before they are done baking, you can place a sheet of aluminum foil over top for the last few minutes.
Recipe adapted slightly from an ad for a Southern Living Cookbook… I think it’s in the Christmas with Southern Living 2009, but not sure.
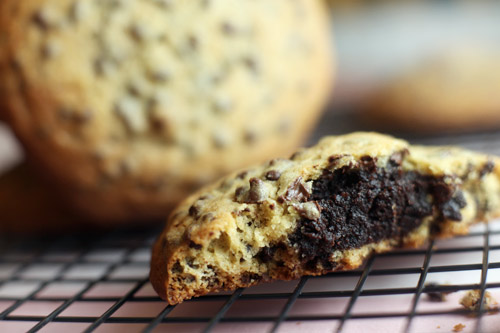
Enjoy!
P.S. If there was ever a time to use the term “Brookies,” this would be a good one.
And there it was. A torn out recipe for Chocolate Chip Brownie Pillows.

Not sugar cookies, but good enough. Better even. And when I read the how-to, it all made sense. I had been throwing around scenarios in my head trying to figure out how the brownie batter and cookie batter all came together to form such soft sugary cookies.
And… It’s easier than you think.

First… bake up some brownies. You can just use your favorite box mix if you like. Let them cool and cut about ten 1 inch squares. You won’t need the rest for the cookies. I’m sure you can find something to do with the leftovers.

Then you need some chocolate chip cookie dough (recipe below). The dough should be chilled for at least an hour before using.
Each cookie uses about 1/2 cup of dough. Yes, you read that right. One half cup. For each.
And yes, they are ginourmous!

All you do is place the dough on parchment paper and make a pretty big indention in the center. Place the small brownie in the middle and fold the dough around it to form a ball. Then bake. I know, I was a bit skeptical at first, too. But it worked perfectly.
Not convinced? Want to see it again.
Okay. here goes.

Place 1/2 cup of cookie dough batter on a parchment lined baking sheet.

Make indentions in the dough and place a 1 inch square brownie in the center of each.

Smoosh it a little, so the cookie dough surrounds the edges of the brownie.

Then work the dough around the top to cover the entire brownie and shape them into balls.
Place no more than 6 on a 15 x 20 inch baking sheet at a time because these guys are HUGE!
Bake and voila………


Giant pillow cookies. Now these are much, much, much larger than the ones I had from the Fresh Market. And actually, the process may not even be similar, but the result reminds me of them. I’m guessing these could go smaller if you like, just use a smaller brownie to start.
But I love how big the are.

Gigantic.
I guess you want to see the inside.
The magic.
The pillowy goodness.
Let’s face it – you just want to see the brownie.
I know. I know.
Okay, here ya go…

Oh my.

I’m in love.
Brownie Pillow Cookies
1 package brownie mix
1 cup butter, room temperature
1 1/2 cups packed light brown sugar
2 large eggs, plus 1 egg yolk
1 tablespoon vanilla
2 1/2 cups all purpose flour
2 teaspoons baking powder
1/2 teaspoon salt
1/2 teaspoon baking soda
12 oz. bag miniature semi-sweet chocolate chips
Make brownies according to package and let cool. Cut about ten 1 inch squares. Enjoy the remaining brownies. (I used a pan about 8 X 8)
For the chocolate chip cookie dough, beat butter with a mixer until creamy.
Add brown sugar and beat until smooth.
Add eggs, yolk and vanilla. Beat until smooth.
Combine flour, baking powder, soda and salt in a medium bowl and stir together with a wire whisk.
Add flour to butter mixture and beat until combined. Stir in mini chips.
Let dough chill covered in the refrigerator for at least an hour.
Preheat oven to 350 degrees.
Use a measuring cup to scoop batter by the 1/2 cup. Since it’s chilled, you may need to pack it with a spoon. Then use the spoon to remove the dough from the cup and place it on parchment paper. Work quickly so the dough remains chilled or either prepare one cookie at a time so the rest of the dough remains cold.
After the dough is on the parchment paper, make an indention and place a 1 inch square brownie in the center. Press the brownie down gently and work the remaining dough around the brownie. You can use your hands to shape the dough into a ball.
During this step, I found it easier to use a piece of parchment paper as a work surface since the dough can get sticky and then I used another piece of parchment paper for the baking sheet. If your dough gets too soft, you can chill the rolled dough balls for a few minutes right before baking.
Prepare six cookies at a time using a large baking sheet (15 X 20) and bake at 350 degrees for about 18 minutes. Return the remaining dough to the refrigerator until time to bake the second batch.
Cool on the baking sheet for a few minutes and then cool completely on a wire rack.
Makes about ten cookies using a little less than a 1/2 cup of dough for each cookie.
If your cookies start to get too brown before they are done baking, you can place a sheet of aluminum foil over top for the last few minutes.
Recipe adapted slightly from an ad for a Southern Living Cookbook… I think it’s in the Christmas with Southern Living 2009, but not sure.

Enjoy!
P.S. If there was ever a time to use the term “Brookies,” this would be a good one.
